How to install
How to install
How to Install and Launch ProSPeReS VR Application:
-
Download the ProSPeReS Application:
-
Download the ProSPeReS VR application from the following link ProSPeReS VR Application
-
-
Install the ProSPeReS Application:
-
Launch the Oculus Developer Hub or Meta Quest Developer Hub application on your computer.
-
Open the directory where you have the ProSPeReS application files (with the .apk extension).
-
Click on the application file and drag it into the designated installation area, similar to how you would in Windows.
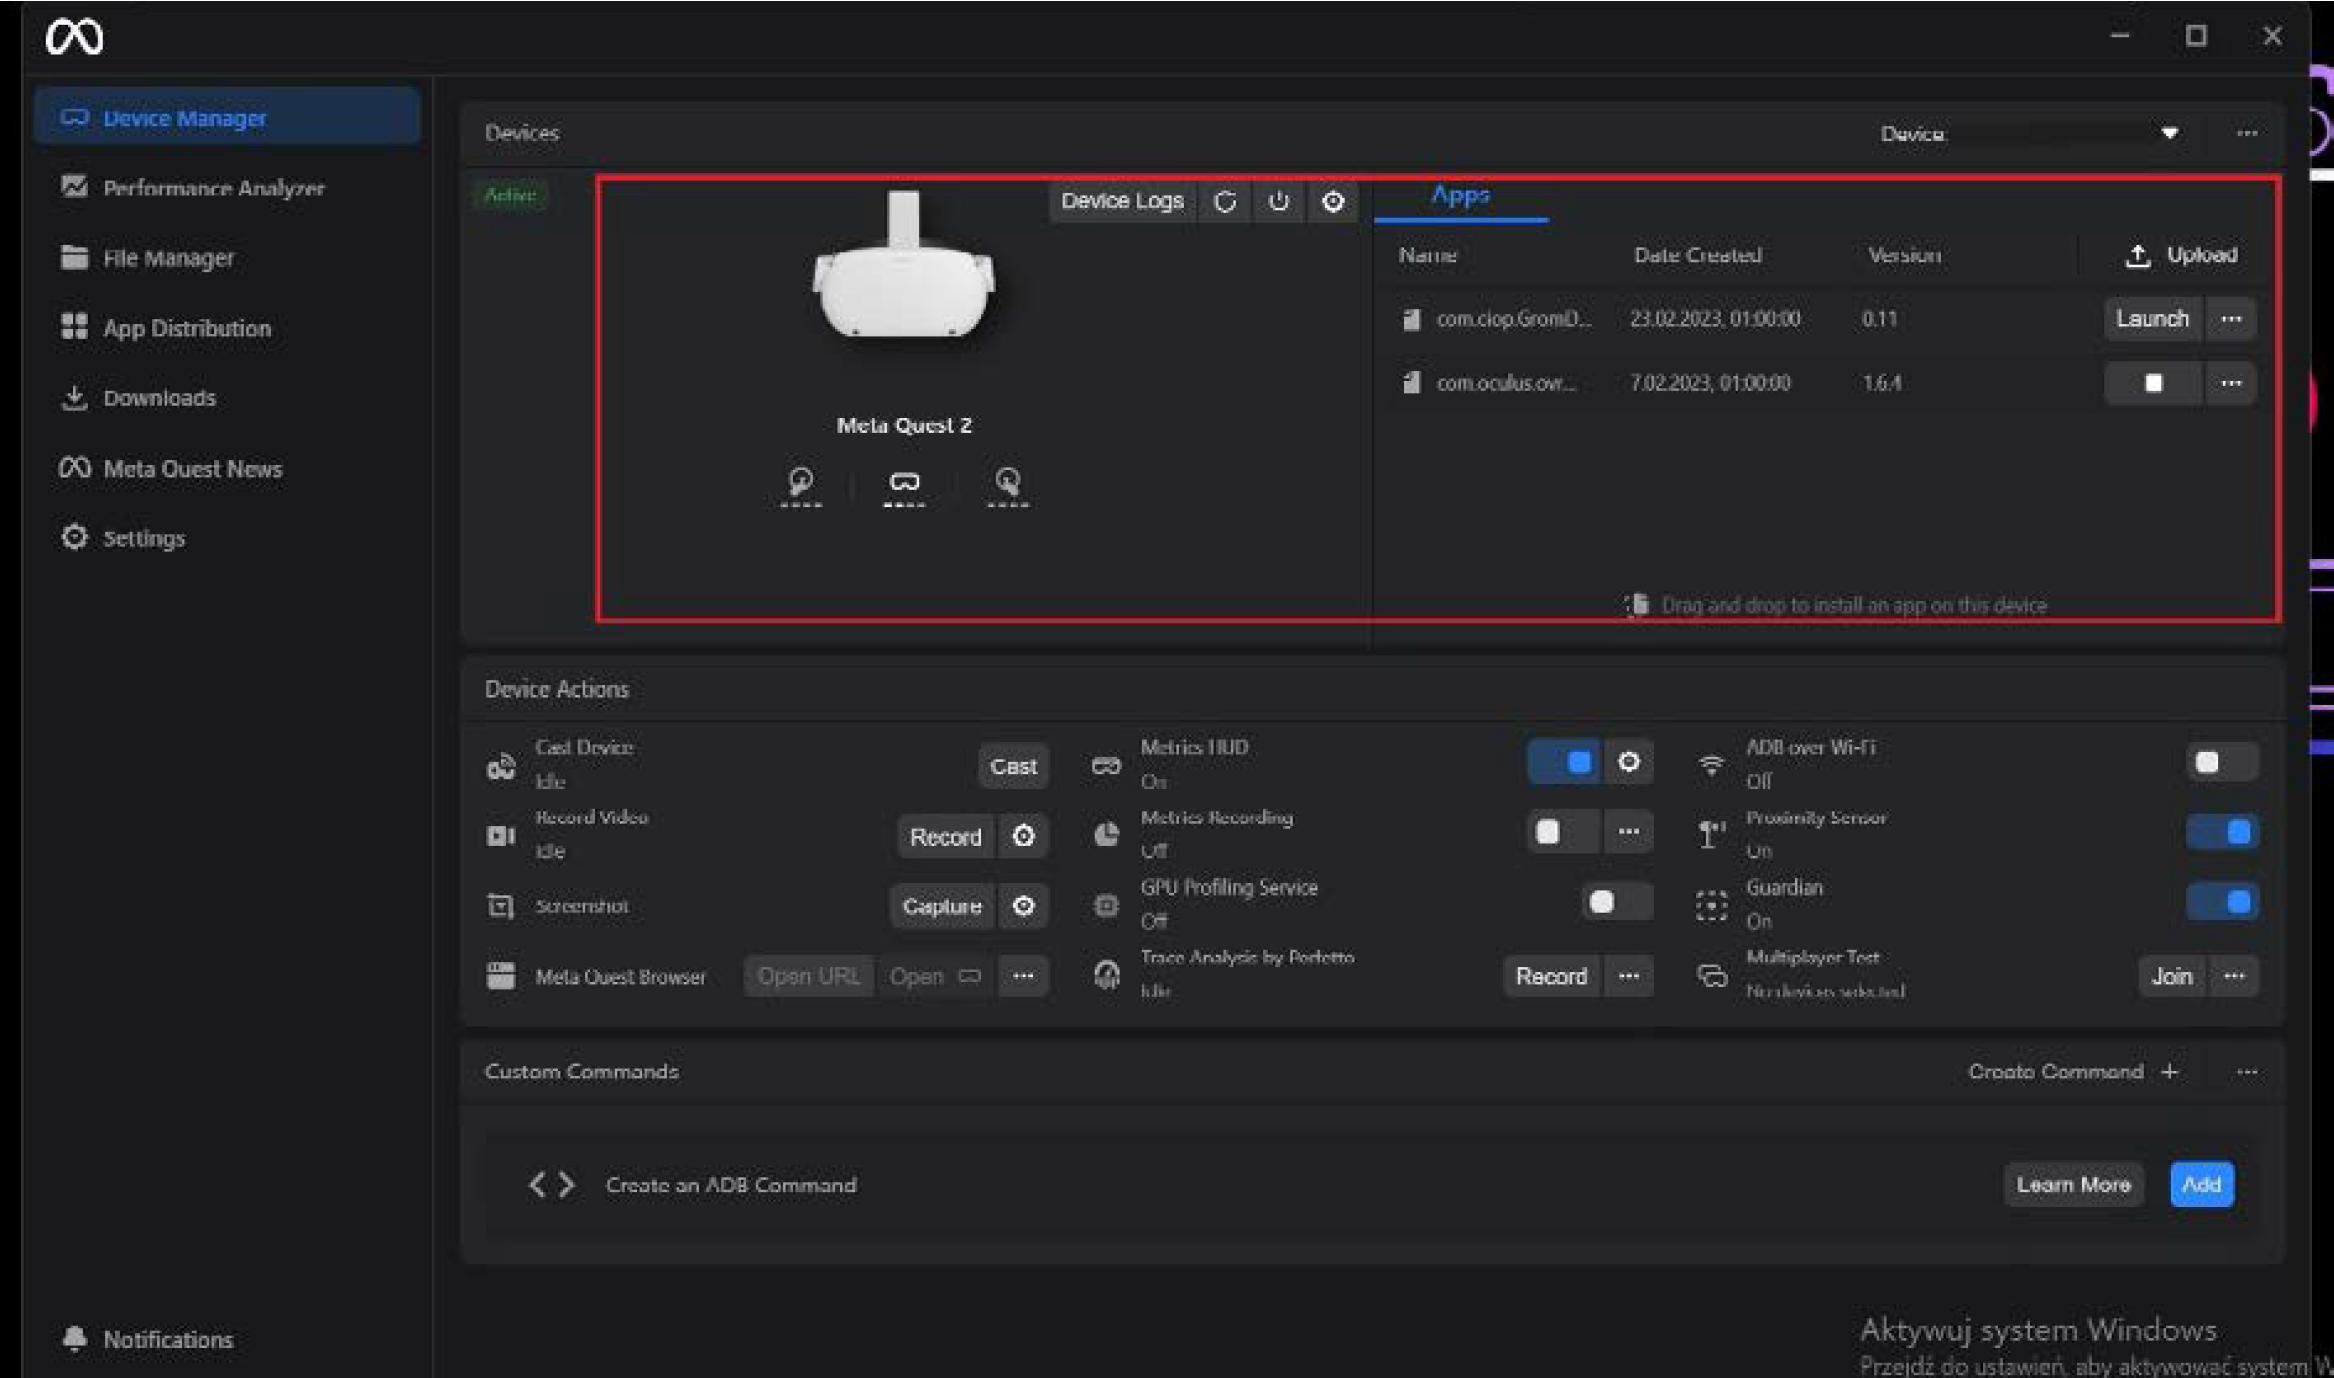
Figure 1
Place red colour marker where application file should be dropped
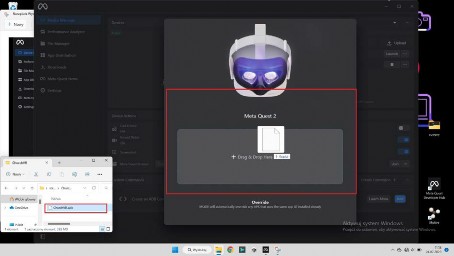
Figure 2
A window like that shown here will appear when you hover your mouse over it.
Launching the ProSPeReS Application:
-
To run the application with the goggles:
-
Open the application library on your Oculus Quest 2 goggles.
-
In the upper right corner, press the drop-down menu and select “unknown sources”.
-
You will see the applications installed by the user; select the ProSPeReS application.
-
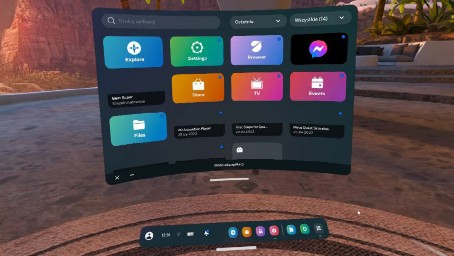
Figure 3
Application library
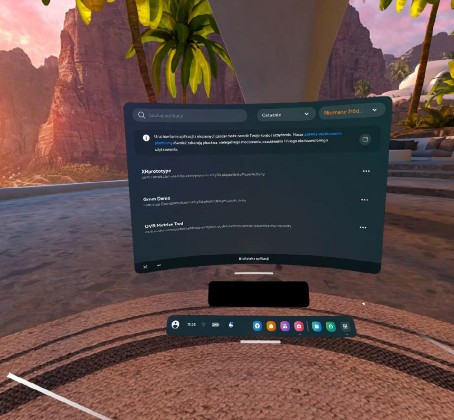
Figure 4
Installed applications
Launching the ProSPeReS Application via the Developer Hub:
Click on “Launch” in the ProSPeReS app as seen in the area outlined by a red box in the Developer Hub/Device Manager.
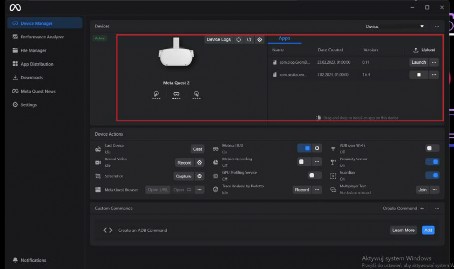
Figure 5
Developer Hub – launch application
How to Navigate in a VR Environment Using Oculus Quest 2 Controllers:
-
Joystick on the right controller: Use this for slow forward/backward movement.
-
Right trigger: Use this for action/confirmation.
-
Joystick on the left controller + trigger button (left controller):
This allows you to jump to the place marked with an orange circle. -
Round button on the right controller: Press briefly for fire action.
-
Round button on the right controller: Press long to turn off the goggles.
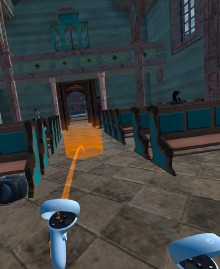
Figure 6
Jump displacement
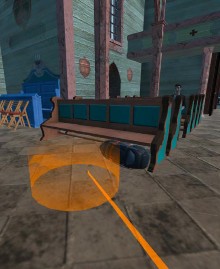
Figure 7
Place of interaction
Broadcast via Developer Hub:
To broadcast your VR experience, follow these steps:
-
Connect the router to the internet (only needed to start the transmission; you can disconnect it later).
-
Ensure both the computer and the goggles are connected to the same Wi-Fi network.
-
Connect the goggles to the computer using a cable.
-
Launch the Oculus Developer Hub or Meta Quest Developer Hub application on your computer.
-
In the application, go to “Device Manager” and turn on “ADB over Wi-Fi”. Wait until it shows “On” under “ADB over Wi-Fi”.
-
Once connected, you can disconnect the cable from the headset. If the headset gets disconnected, repeat the step.
-
After connecting the goggles, click on the “Cast” button, and the transmission should start.

Figure 8
Broadcast via developer hub
© 2023 ProSPeReS Training Platform